

How To Change A Honda Crv Headlight Bulb
Honda CR-V Headlight Bulbs Replacement Guide
How to change a low/high beam, turn signal or side marker light bulb in a 3rd generation 2007-2011 Honda CR-V.
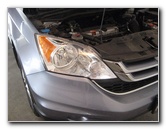
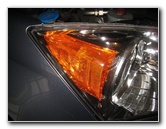
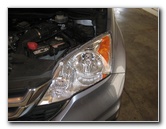
2011 CR-V Headlight
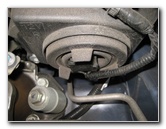
Rear of Low/High Beam
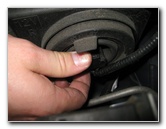
Pull Off Electrical Connector
Owners of other Honda or Acura vehicles such as the Pilot, Insight, CR-Z, Accord, Civic, Fit, Crosstour, Odyssey, Ridgeline, TSX, ILX, TLX, TL, RLX, RDX and MDX may also find these DIY instructions to be helpful.
Replacement bulbs with their part numbers are as follows: Low/High Beam Headlight # 9003, Front Turn Signal # WY21W (also 7440A or 7440NA) and Front Side Marker # 2825 (also 168 or W5W).
No tools are needed to change any of the bulbs in either the driver or passenger side headlight assemblies.

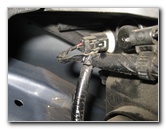
Power Plug Removed
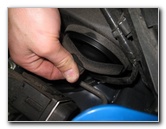
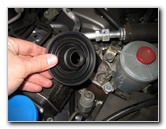
Pull Off Rubber Dust Cap
Rubber Cover Removed
To view the extra steps needed to access the bulbs on the driver side, scroll down to the last few rows of pictures on this page.
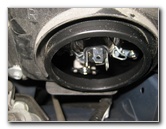
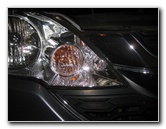
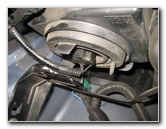
The Low/High Beam Bulb is located at the center of the housing.
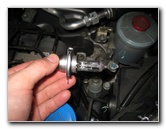
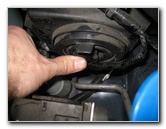
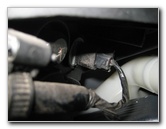
Pop open the hood and reach in behind the headlight housing.
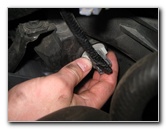
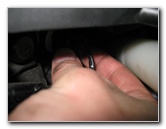
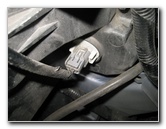
Gently pull off the black plastic electrical connector from the base of the old bulb.
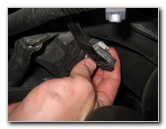
Then pull out the black rubber dust cap that covers the bulb socket. Set the cover aside in a safe place.
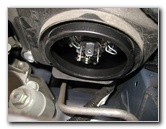
Headlight Bulb Exposed
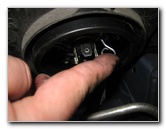
Push Arm In & Up To Release
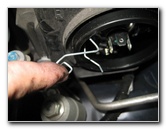
Retaining Arm Released
To release the arm, press the loop on the right side in towards the front of the car and lift it up off the hook.
Swing the retaining arm open towards the rear of the vehicle and to the left side.
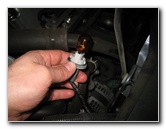
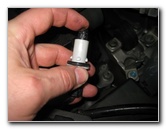
Pull Out Old # 9003 Bulb
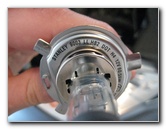
Stanley 9003 12V 60/55W
Headlight Bulb Socket
The OEM low / high beam headlight bulb in this 2011 Honda CR-V was a Stanley # 9003 12V 60/55W.
The 9003 dual filament bulb is also available from other manufacturers such as Sylvania, Philips, GE, Hella, and PIAA.

Swing Open Retaining Arm
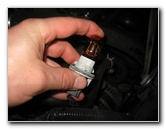
Insert New # 9003 Bulb
Close Arm & Secure In Hook
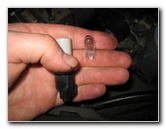
If you do get the new bulb dirty, wipe it clean with an alcohol moistened paper towel.
Make sure that the metal retaining arm is all the way open to the left and insert the new # 9003 bulb in to the socket.
Swing the retaining arm closed to the right and push it down in to the metal hook. Make sure that the arm is holding the new bulb securely in place.
Rubber Dust Cover
Push Rubber Cap In Place
Line Up Power Plug
Push On Electrical Connector
Turn Signal Bulb Inner Corner
Turn Signal Bulb Socket
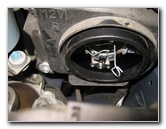
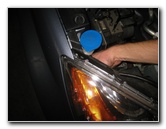
The Turn Signal light bulb is located at the inner corner of the headlight assembly.
1/4 Turn Counterclockwise
Pull Out Bulb Socket
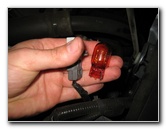
Pull Out Old WY21W Bulb
Pull the old turn signal bulb straight out of the socket and push in a new amber colored # WY21W bulb.
You should also be able to use the amber colored # 7440A or 7440NA bulbs.
Push In New Bulb
Turn Signal Bulb Housing
1/4 Turn Clockwise - Lock
Side Marker - Outer Corner
Side Marker Bulb Socket
1/4 Turn Counterclockwise
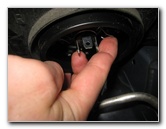
Reach in behind the headlight housing and rotate the small light grey bulb socket 1/4 turn counterclockwise before pulling it straight out.
Pull Out Bulb Socket
Pull Out Old # W5W Bulb
Push In New W5W Bulb
You may also be able to use any other miniature wedge base bulbs such as the # 168, 194, W5W or a brighter LED unit.

Side Marker Bulb Housing
1/4 Turn Clockwise - Lock

Side Marker Re-Installed
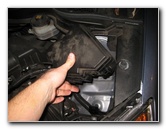
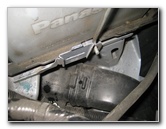
Driver Side Headlight
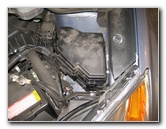
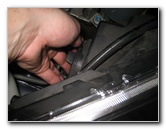
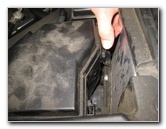
Fuse Box Blocking Access
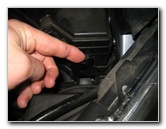
Fuse Box Release Tab
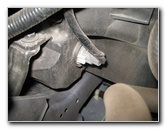
The fuse box is held in place to the engine bay three plastic clips.
Gently Pull Tab Forward
Pull Out Side Release Tab
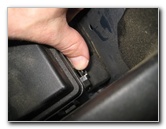
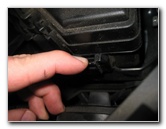
Pull Back Rear Release Tab
Pull Up Fuse Box
Set Aside Fuse Box
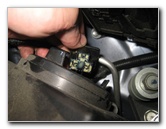
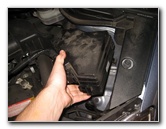
Driver's Side Marker Socket
With the fuse box out of the way, you can easily reach the driver side headlight bulb and side marker bulb socket.
Driver Low/High Beam Bulb
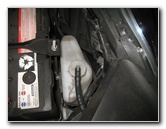
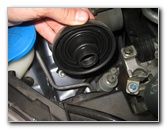
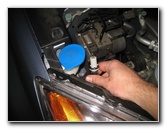
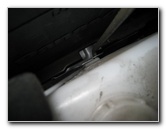
Coolant Overflow Bottle
Tank On Mounting Bracket
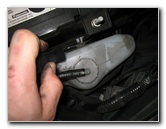
Pull Bottle Up & Off Bracket
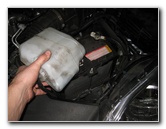
Set Coolant Tank Aside
Driver's Front Turn Signal
Now you can easily access the driver side turn signal bulb socket.
Replace Coolant Bottle
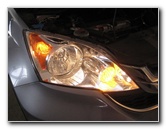
Test New Headlight Bulbs
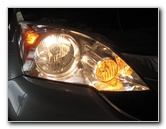
Testing High Beam
Test the new bulbs by turning on the headlights, activating the hazard signals and flashing the high beams.
For more, check out my other Honda CR-V Repair & Maintenance Guides.
How To Change A Honda Crv Headlight Bulb
Source: https://www.paulstravelpictures.com/Honda-CR-V-Headlight-Bulbs-Replacement-Guide/index.html
Posted by: rodrigueztuslies.blogspot.com
0 Response to "How To Change A Honda Crv Headlight Bulb"
Post a Comment